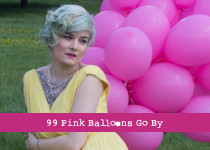
7 Purse Essentials for Spontaneous Magic

purse-essentials-magic“And above all, watch with glittering eyes the whole world around you because the greatest secrets are always hidden in the most unlikely places. Those who don’t believe in magic will never find it.” -Roald Dahl

Our lives become more magical not from purchasing luxury goods or even from overhauling our routines, but from taking time to savour all of life’s small joys and living in awe of all the wondrous things happening around us. That being said, I think there are many things we can do to live more magically. Seek out silliness. Inject delight into your day. Infuse your routine with merriment. Take time to make the world more beautiful.

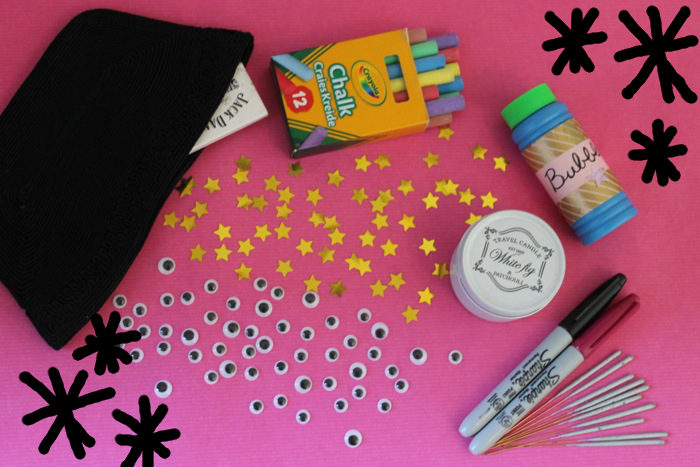
Here are seven small items to keep in your handbag for creating spontaneous bursts of magic. And you could go out and buy them all right now for less than a tenner.

Bubbles
“Blowing bubbles” was one of the prompts for #radicalselflovejuly. I picked up this little bottle at an off license for 50p and have been carrying them in my purse ever since. I pull it out to blow bubbles when I’m walking down the street, sitting in the park, hanging out in a beer garden, or even just dancing in my room. It’s amazing to watch the joy that lights up people’s faces when they see bubbles floating past. The simplest magic.

Travel Candle
For making spontaneous picnics, park dates, or an afternoon drink by the canal instantly more romantic.

Confetti
For throwing in celebration, blowing into the camera, tucking into envelopes, hiding in newspapers, and leaving a glittery trail in your wake.
IMG_4848Sharpies
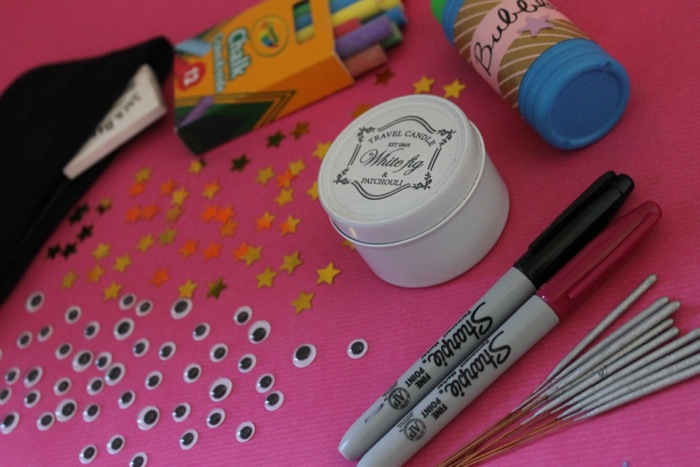
For scrawling encouraging messages on park benches, joining the conversation on the walls of bathroom stalls, writing love letters on your arms, and leaving your mark on the world.

Colourful chalk
If permanent graffiti is too rebellious for you, leave positive messages on the sidewalk to make passersby smile (I wrote this one in July) or have an impromptu drawing session with your friends.

Sparklers
For spontaneous celebrations, lighting up cupcakes, spelling your name in the dark, and waving around with absolute glee just because you can.

Googley Eyes
For pulling silly faces, defacing offensive ads, dressing up condiment bottles, giving your tattoos a humourous twist, and adding life your doodles (see Chloe Rice for lots on inspiration).

What’s your favourite way to make your life a little bit more magical?

Yours in everyday magic,
signature-new


blogwarts-robesBlogwarts is an 8-week course and lifetime community for heroines in training who tire of living vicariously through fiction and want to burst their dreams into reality. It is hosted by Xandra from Heroine Training.

You found a Blogwarts telescope! Tweet a link to this page to @missxandrabee, and find the other 7 objects to receive a 20% discount on admission. Apply now to reserve your place, and the discount can be applied at any time.
52 Weeks of D.I.Y: Paper Bunting Flags

paper-bunting-flagsFirst off, I’d like to congratulate my dear friend Taryn on winning the giveaway with Ashley Jane Illustration. She’s a new blogger and I know she’s been wanting to give her layout a refresh, so I’m sure a beautiful custom illustration will be just the thing.

Okay, confession: I’ve done almost no DIY’ing since I arrived here in England. It’s been a bit discouraging not having any of my supplies with me, as it makes every project seem really expensive to tackle. Especially when I know I’d have so many of the things I need back at home.

Attending the Renegade Craft Fair on Saturday left me really fired up to make something. I’d seen a lovely set of bunting flags made from old book pages, but I just couldn’t justify the expense when I knew I could make them quite easily. On Sunday I picked up a vintage French magazine at a flea market and that evening I got to work while watching the latest episode of Scandal.

paper-bunting-flags2

This project probably doesn’t necessitate a how-to post and might just leave you thinking, ‘Well duh, Sarah!’ But anyway, if you’d like to make your own bunting flags you’ll need your paper of choice, scissors, a gluestick, and ribbon.

I cut a piece of scrap paper into a template. My triangles are approximately 4×6″ but you can do any size you’d like. I then cut a piece a ribbon a little bit longer than the space above my desk to allow it to drape. I cut triangles out of pages from the magazine using the template and stuck them to the back of the ribbon with the gluestick. A few pieces of washi tape to hang them and ta-da! My room is looking a little bit cuter already.

Have you made any fun projects lately? I’d love some tips for fun D.I.Ys that don’t require a bunch of specialized supplies.

Yours in craft,
signature

52 Weeks of DIY // How to Make a Flower Crown

diy-flower-crown-1It’s been a quiet week around these parts, as I’ve been busy finalizing last minute details for my move, finishing work projects, and oh… getting sick. D’oh! I spent last night curled up in bed feeling sorry for myself and watching trashy TV, but I did manage to squeeze a D.I.Y. project in.

This one has been on my list for ages. I actually ordered the roses off Etsy in December (from this seller), but just got around to making it now. I was heavily inspired by the Crown & Glory Whole Lotta Rosie headbands and after looking at a few tutorials online, I went my own route with the supplies I already had on hand.

diy-flower-crown-2 diy-flower-crown-3You’ll need: 20 gauge wire, 2-3 feet of ribbon, fake flowers & leaves, hot glue gun & glue, felt cut into small (~2cm) circles
1. Measure your head and cut a piece of wire a few centimetres larger. 2. Form your wire into a circle and twist the ends around the wire to keep it together. Add a little hot glue here for added security. 3. Put a small line of hot glue on the wire and stick the end of your ribbon to it. 4. Begin wrapping your ribbon around the wire, adding hot glue every once in a while to keep it in place. When you get all the way  around, glue ribbon down. 5. Cut roses off stems so that there is a flat surface. 6. One a a time, glue a rose onto your crown. Hold it in place until it dries and then glue one of the felt pieces over the wire so that it holds  your rose in place. Continue with the rest of your roses.

I didn’t take any process shots, so I hope my explanations are clear enough. It’s a really easy process, but please let me know if you have any questions.

The roses I used are quite large, so this is definitely a statement piece, but you could use the same method with whatever sized flowers you’d like.

Let me know if you give it a try. I’d love to see a picture!

Love & roses,
signature

52 Weeks of DIY // Chevron Rings & a Peacock Necklace

diy-chevron-rings copy
Even though I’m so busy with work and getting ready to move, I’m glad I’ve stuck with my goal of DIY-ing every week. I get a bit of a charge from taking the time to be creative and it’s just like being in the shower, I always have my best ideas when I get away from the other things I’ve been working on.

I found this tutorial for D.I.Y. chevron rings on Pinterest and knew I wanted to give it a try. I love the above-the-knuckle ring trend and these delicate pieces look so pretty all stacked together.

diy-chevron-rings-2This project wasn’t a complete success. The wire I’d initially bought at Michael’s was too thick and I couldn’t get it to bend properly. I ended up using some cheap craft wire I bought from the dollar store for another project. The rings are pretty flimsy, so I’m guessing they won’t last long. I’ll be wearing them today though and making them gave me some practice with the technique. I’ll definitely be making some more once I get the right guage of wire.

peacock-feather-necklaceI didn’t use a tutorial to make this necklace – I just designed it from a few supplies I already had on hand. There’s a peacock feather, a slice of agate, and a small leaf charm strung together on gold chain. I’m giving it to my friend Tea for her birthday, which is a few days after I leave.

I also made a batch of my poison-free deodorant. It’s SO much more effective than the natural brand I was using all summer. I shouldn’t have put off making it for so long. And I whipped together Meghan’s Edible Body Butter. It smells amazing and makes my skin so soft – I definitely recommend this recipe!

Have you worked on any fun projects this week? Do you plan to give any of these a try?

signature


52 Weeks of D.I.Y. // Maxi Skirts and Bullet Casing Necklaces

diy-bullet-crystal-necklacesThis week has been quite productive on the D.I.Y. front – I completed two projects that I’ve been itching to make (because I really, really wanted to wear them).

First was these crystal bullet casing necklaces. I’d seen them on Etsy, but never managed to justify the expense. I collected a few casings when we went to the gun range, with hopes that I could figure out how to make them myself. I found this tutorial on Tanya’s blog and a friend of mine brought his drill over to make the holes in the top. My crystal points weren’t drilled, so I created a small knot in the bottom of the wire before threading it through the hole and then I made the loop according to the tutorial. Then I just used my favourite superglue to attach the crystals inside of the casings. I made the necklaces a variety of lengths. I think they look really cool all layered together.

diy-maxi-skirtsI’ve also been lusting after luxurious maxi skirts, but the ones I like best are always quite pricey. I was able to make these for less than $10 each using this tutorial (no pattern required). The only change I made was to take the hips in a little bit to give them a more fitted look on top. I used dark blue stretch velvet and a heavy hot pink jersey (both from Fabricland). I’m really happy with how they came out and I think they’d be easy to whip up, even if you’re an inexperienced sewer.

What about you: have you worked on any D.I.Y. projects this week? Do you want to give either of these tutorials a try?

Happy crafting!
signature

Sign up for weekly love letters + tips for living more magically & receive a free MP3 copy of the introduction to my forthcoming ebook, The Daydream Revolution. Let's make some magic!
Hello. Add your message here.